Steve - Hey, way cool. Like the woodwork on the floors and the stairway. It has space for an office with its own porch! And we kinda get that fireplace we wanted! It has a garage! The kitchen is nice too.
Chris - It's okay. The upstairs layout is kind of odd. I like the kitchen. The woodwork is nice. Not sure about the parking situation though.
Then there was something of a revelation on the part of Ms Rivers:
Chris - Hey, we could turn the 10'x10' bedroom into a spare bathroom! That would solve a lot of problems! I could also move the washer and dryer upstairs.
Then I went into full "2 year civil engineering student mode" and immediately figured out how the plumbing would run. Fast forward a week or two and we have a plumbing contractor looking at the house (which was our third viewing of the home...God bless the former owners for being so patient with us) and he agrees that the new bathroom idea is very do-able. In fact, in the whole process we only made one mistake...more on that in a bit.
The actual work commenced a few weeks after I moved in, back in December. Technically it's still not 100% complete, as we need to have some roof work done having to do with venting; that work couldn't be finished until after the snow melted, as it's simply not safe to have a ladder sitting on ice (even I know that...). From a cosmetic and functional perspective the work has been done for a while now, with the last two items being things that I did: adding a privacy film over the window and mounting a towel rack/shelving over the toilet.
Here are some pictures.

January 5, 2014 - This was the space before work began. The room is about 10'x10' with no closet. There was a wall-mounted light that was controlled by a pull-chain (no switch). Like the rest of the house, it has an electric heat register, controlled by its own thermostat.

January 7, 2014 - Work begins. It was my idea to have the plumbing running outside the exterior wall (facing inside the house), down into the basement. This eliminated the need to open up walls downstairs and prevents the water lines from ever freezing. On the first floor the plumbing was covered by boxing in a corner right by the front door. The troth you see here is where the plumbing will be run; top left is where the venting, waste water and water service come into the room. The right hand side is where the washer and dryer will be located. The house itself is very well insulated for an older home; if you look at the left hand side you can see insulation in wall itself.
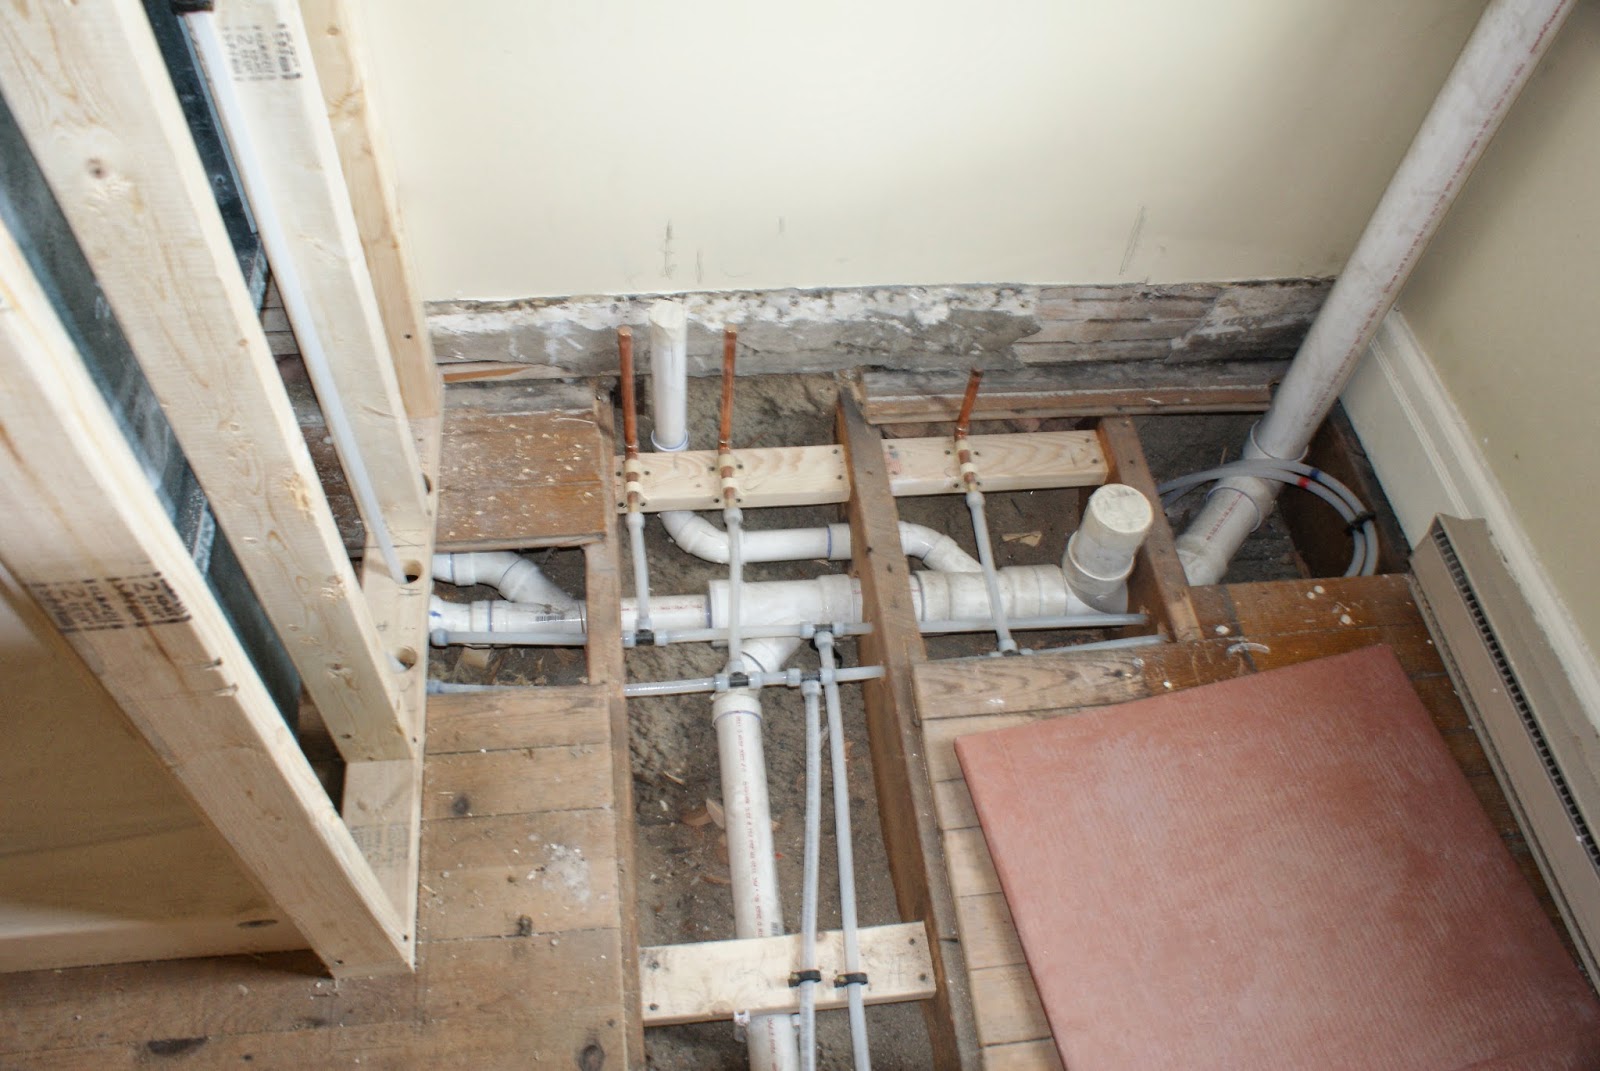
January 11, 2014 - Plumbing is installed. On the left will be the shower, the center the vanity and the right the toilet. In the center you can see the waste and service lines running to the washer. What you can't see? That would be the extensive electrical work we had to have completed to make the project work. There was a secondary electric service panel in the attic, but was of a brand that is known to randomly burst into flames (the only negative on our inspection report), so we had it replaced with a Square D panel, upgraded to accommodate an electric dryer. We also had an overhead vent, night light, main light and heat lamp installed in the ceiling as well, plus the addition of many new outlets and lighting above the vanity.

January 25, 2014 - Rough work is complete and painting has begun. We picked a light purple, bathroom grade paint for the walls, with the trim being gloss white. You can also see the electrical box where the overhead light, night light, vent fan and heating lamp will be controlled.

March 23, 2014 - The finished product. The flooring we picked as a high-grade Armstrong vinyl. We did think about putting stone on the floor, but with an older home that's problematic because of the floor not being completely, 100% level. What's more, having a washing machine in the room also meant that we'd want something that could easily handle the possibility of water spills (but we also purchased the best water service lines available to connect into the washer, lines that should really last 10+ years). You can also see the light/night light/heater and vent unit at the top of the picture.
In doing this project, we had a couple guidelines that helped us make decisions:
- Substance - Since the bathroom is primarily for Ms River's sons, we wanted the materials to be "teenage boy" proof to the greatest extent. That meant very durable paint, flooring and fixtures.
- Protection - Given the whole teenage boy thing, and the fact that this was also going to be a laundry room, we made deliberate decisions about ancillary materials, including the above referenced high-quality steel water service lines, the use of a pan under the washer, timers for the vent and overhead heating units (boys forget to turn things off...I should know, as I was once a boy...), and best-possible quality electrical service lines and sub-panel.
- Future Improvements - The "laundry side" of the room is designed such that we can upgrade the washer and dryer in the future. Ideally that would mean having stacked unit that would then allow us to install something like a clothes folding table.
My only regret? Well, that would be in the economics side of this project. I made the mistake of first mentioning a budget for the project to the contractor, which of course is what the total project cost came in at; this means that we either got a great deal financially on this, or we, well, didn't. Lesson learned: next time ask them what it will cost before telling them what you would be willing to pay. Now in the grand scheme of things it will all work out, because we got the property at about $25,000 less than what our upper-mid point was for a house purchase, so we more than had the money to make this happen. What's more, we think that having a house with 2.5 bathrooms and an upstairs laundry room definitely increases the value of the property. Lastly, having the new full bathroom enabled us to do some other minor work upstairs to create a master suite, complete with its own bathroom, office, and screened in second floor porch.
In the end, it's definitely been worth the money and the inconvenience. We're even thinking about our next two projects: re-locating the basement steps (which will allow us to create a full walk-in pantry in the kitchen) and a deck attached to the rear (first floor) porch.
No comments:
Post a Comment